编译安装nginx
2022-01-13文远技术博客319374
本文介绍nginx的安装
1. 准备
注意:一般我们都需要先装pcre, zlib,前者为了重写rewrite,后者为了gzip压缩。安装目录可以是任何目录,这里选择的是/usr/local/nginx/srclib
安装pcre库
https://ftp.pcre.org/pub/pcre/ 下载最新的 PCRE 源码包,使用下面命令下载编译和安装 PCRE 包:
[root@lnmp ~]# mkdir -p /usr/local/nginx/srclib
[root@lnmp ~]# cd /usr/local/nginx/srclib
[root@lnmp srclib]# wget https://ftp.pcre.org/pub/pcre/pcre-8.44.tar.gz
[root@lnmp srclib]# tar -zxvf pcre-8.45.tar.gz
[root@lnmp srclib]# cd pcre-8.45
[root@lnmp srclib]# ./configure
[root@lnmp srclib]# make && make install
安装zlib库
http://zlib.net/zlib-1.2.11.tar.gz 下载最新的 zlib 源码包,使用下面命令下载编译和安装 zlib包:
[root@lnmp srclib]# wget http://zlib.net/zlib-1.2.11.tar.gz
[root@lnmp srclib]# tar -zxvf zlib-1.2.11.tar.gz
[root@lnmp srclib]# cd zlib-1.2.11
[root@lnmp srclib]# ./configure
[root@lnmp srclib]# make && make install
安装ssl
[root@lnmp srclib]# wget https://www.openssl.org/source/openssl-1.1.1g.tar.gz
[root@lnmp srclib]# tar -zxvf openssl-1.1.1g.tar.gz
如果上述下载链接超时无响应可以使用我准备的(点击获取)
安装依赖
[root@lnmp nginx-1.18.0]# yum install gcc gcc-c++ automake autoconf libtool make gd gd-devel libxslt-devel2、安装nginx
Nginx 一般有两个版本,分别是稳定版和开发版,您可以根据您的目的来选择这两个版本的其中一个,下面是把 Nginx 安装到 /usr/local/nginx 目录下的详细步骤
[root@lnmp nginx-1.18.0]# cd ~
[root@lnmp nginx-1.18.0]# wget http://nginx.org/download/nginx-1.18.0.tar.gz
[root@lnmp nginx-1.18.0]# tar -zxvf nginx-1.18.0.tar.gz
[root@lnmp nginx-1.18.0]# cd nginx-1.18.0
是否有www用户和www组,没有则创建
[root@lnmp nginx-1.18.0]# groupadd www
[root@lnmp nginx-1.18.0]# useradd -r -g www www
开始编译安装
root@lnmp nginx-1.18.0]# ./configure --user=www --group=www --prefix=/usr/local/nginx --conf-path=/usr/local/nginx/conf/nginx.conf --pid-path=/var/run/nginx.pid --with-http_gzip_static_module --with-http_stub_status_module --with-file-aio --with-http_realip_module --with-http_ssl_module --with-openssl=/usr/local/nginx/srclib/openssl-1.1.1g --with-pcre=/usr/local/nginx/srclib/pcre-8.45 --with-zlib=/usr/local/nginx/srclib/zlib-1.2.11出现如下页面,说明没有问题
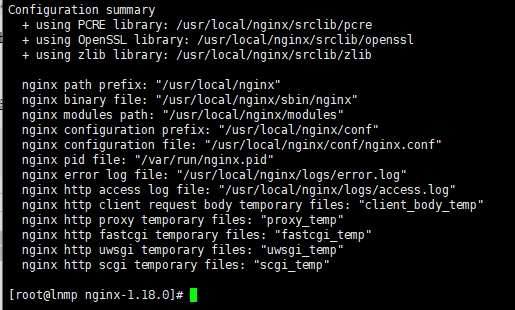
继续
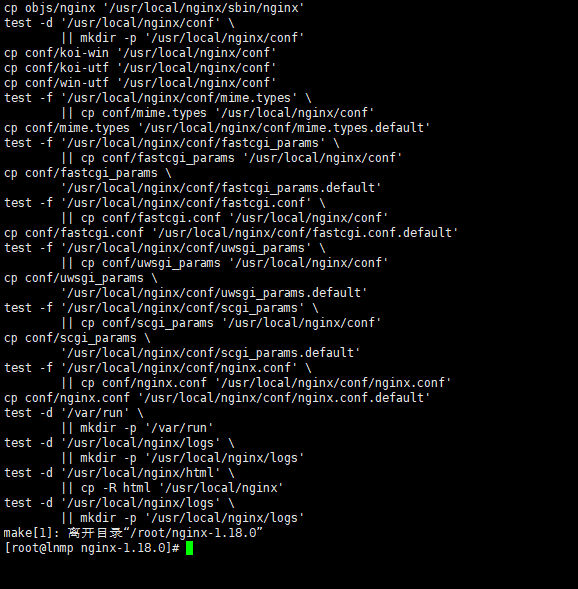
[root@lnmp nginx-1.18.0]# make && make install如图,安装完成
三、配置nginx
进入到nginx安装目录,可以看到nginx的目录结构
[root@lnmp nginx-1.18.0]# cd /usr/local/nginx
[root@lnmp nginx-1.18.0]# ll
设置nginx的服务启动脚本
[root@lnmp nginx]# touch /etc/init.d/nginx
[root@lnmp nginx]# vim /etc/init.d/nginx
[root@lnmp nginx]# chmod a+x /etc/init.d/nginx
在vim /etc/init.d/nginx 后粘贴如下内容,需要注意三处地方(NGINX_BIN、CONFIGFILE、PIDFILE)的路径跟自己的nginx路径保持一致
#! /bin/sh
# chkconfig: 2345 55 25

PATH=/usr/local/sbin:/usr/local/bin:/sbin:/bin:/usr/sbin:/usr/bin
NAME=nginx
NGINX_BIN=/usr/local/nginx/sbin/$NAME
CONFIGFILE=/usr/local/nginx/conf/$NAME.conf
PIDFILE=/var/run/$NAME.pid
ulimit -n 8192

case "$1" in
    start)
        echo -n "Starting $NAME... "
                if [ -f $PIDFILE ];then
                        mPID=`cat $PIDFILE`
                        isStart=`ps ax | awk '{ print $1 }' | grep -e "^${mPID}$"`
                        if [ "$isStart" != '' ];then
                                echo "$NAME (pid `pidof $NAME`) already running. "
                                exit 1
                        fi
                fi
         $NGINX_BIN -c $CONFIGFILE

         if [ "$?" != 0 ] ; then
             echo " failed "
             exit 1
         else
             echo " success "
         fi
         ;;

    stop)
        echo -n "Stoping $NAME... "
                if [ -f $PIDFILE ];then
                        mPID=`cat $PIDFILE`
                        isStart=`ps ax | awk '{ print $1 }' | grep -e "^${mPID}$"`
                        if [ "$isStart" = '' ];then
                                echo "$NAME is not running."
                                exit 1
                        fi
                fi
                $NGINX_BIN -s stop

                if [ "$?" != 0 ] ; then
                    echo " failed. Use force-quit"
                    exit 1
                else
                    echo " done"
                fi
                ;;

    status)
		if [ -f $PIDFILE ];then
                        mPID=`cat $PIDFILE`
                        isStart=`ps ax | awk '{ print $1 }' | grep -e "^${mPID}$"`
                        if [ "$isStart" != '' ];then
                                echo "$NAME (pid `pidof $NAME`) already running."
                                exit 1
                        else
                                echo "$NAME is stopped"
                                exit 0
                        fi
                else
                        echo "$NAME is stopped"
                        exit 0
                fi
                ;;

    restart)
        $0 stop
        sleep 1
        $0 start
        ;;
    reload)
        echo -n "Reload service $NAME... "
                if [ -f $PIDFILE ];then
                        mPID=`cat $PIDFILE`
                        isStart=`ps ax | awk '{ print $1 }' | grep -e "^${mPID}$"`
                        if [ "$isStart" != '' ];then
                                $NGINX_BIN -s reload
                                echo " done"
                        else
                                echo "$NAME is not running, can 't reload."
                                exit 1
                        fi
                else
                        echo "$NAME is not running, can 't reload."
                        exit 1
                fi
                ;;
    configtest)
        echo -n "Test $NAME configure files... "
        $NGINX_BIN -t
        ;;
    *)
       echo "Usage: $0 {start|stop|restart|reload|status|configtest}"
       exit 1
       ;;
esac
nginx基本指令
#启动
[root@lnmp nginx]# /etc/init.d/nginx start

#停止
[root@lnmp nginx]# /etc/init.d/nginx stop

#查看状态
[root@lnmp nginx]# /etc/init.d/nginx status

#重启
[root@lnmp nginx]# /etc/init.d/nginx restart

#重载
[root@lnmp nginx]# /etc/init.d/nginx reload
设置nginx开机自启动
[root@lnmp ~]# chkconfig --add /etc/init.d/nginx启动nginx后,出现Starting nginx... success 提示语,表示启动成功,使用ps查看进程
[root@lnmp nginx]# ps -ef | grep nginx如下信息
root      97906      1  0 21:17 ?        00:00:00 nginx: master process /usr/local/nginx/sbin/nginx -c /usr/local/nginx/conf/nginx.conf
www       97907  97906  0 21:17 ?        00:00:00 nginx: worker process
root      98271   8242  0 21:24 pts/0    00:00:00 grep --color=auto nginx
访问服务器ip地址出现如下页面
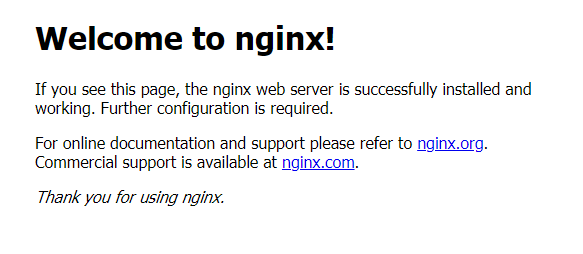
到此,nginx安装完成
相关文章


文章评论
看完文章了吗?谁便说点吧
发表

暂无评论